
Hi everyone. Over the past few weeks, I’ve been quite creatively inspired. Today, I want to show you all some of my sky-themed polymer clay creations. Here goes.
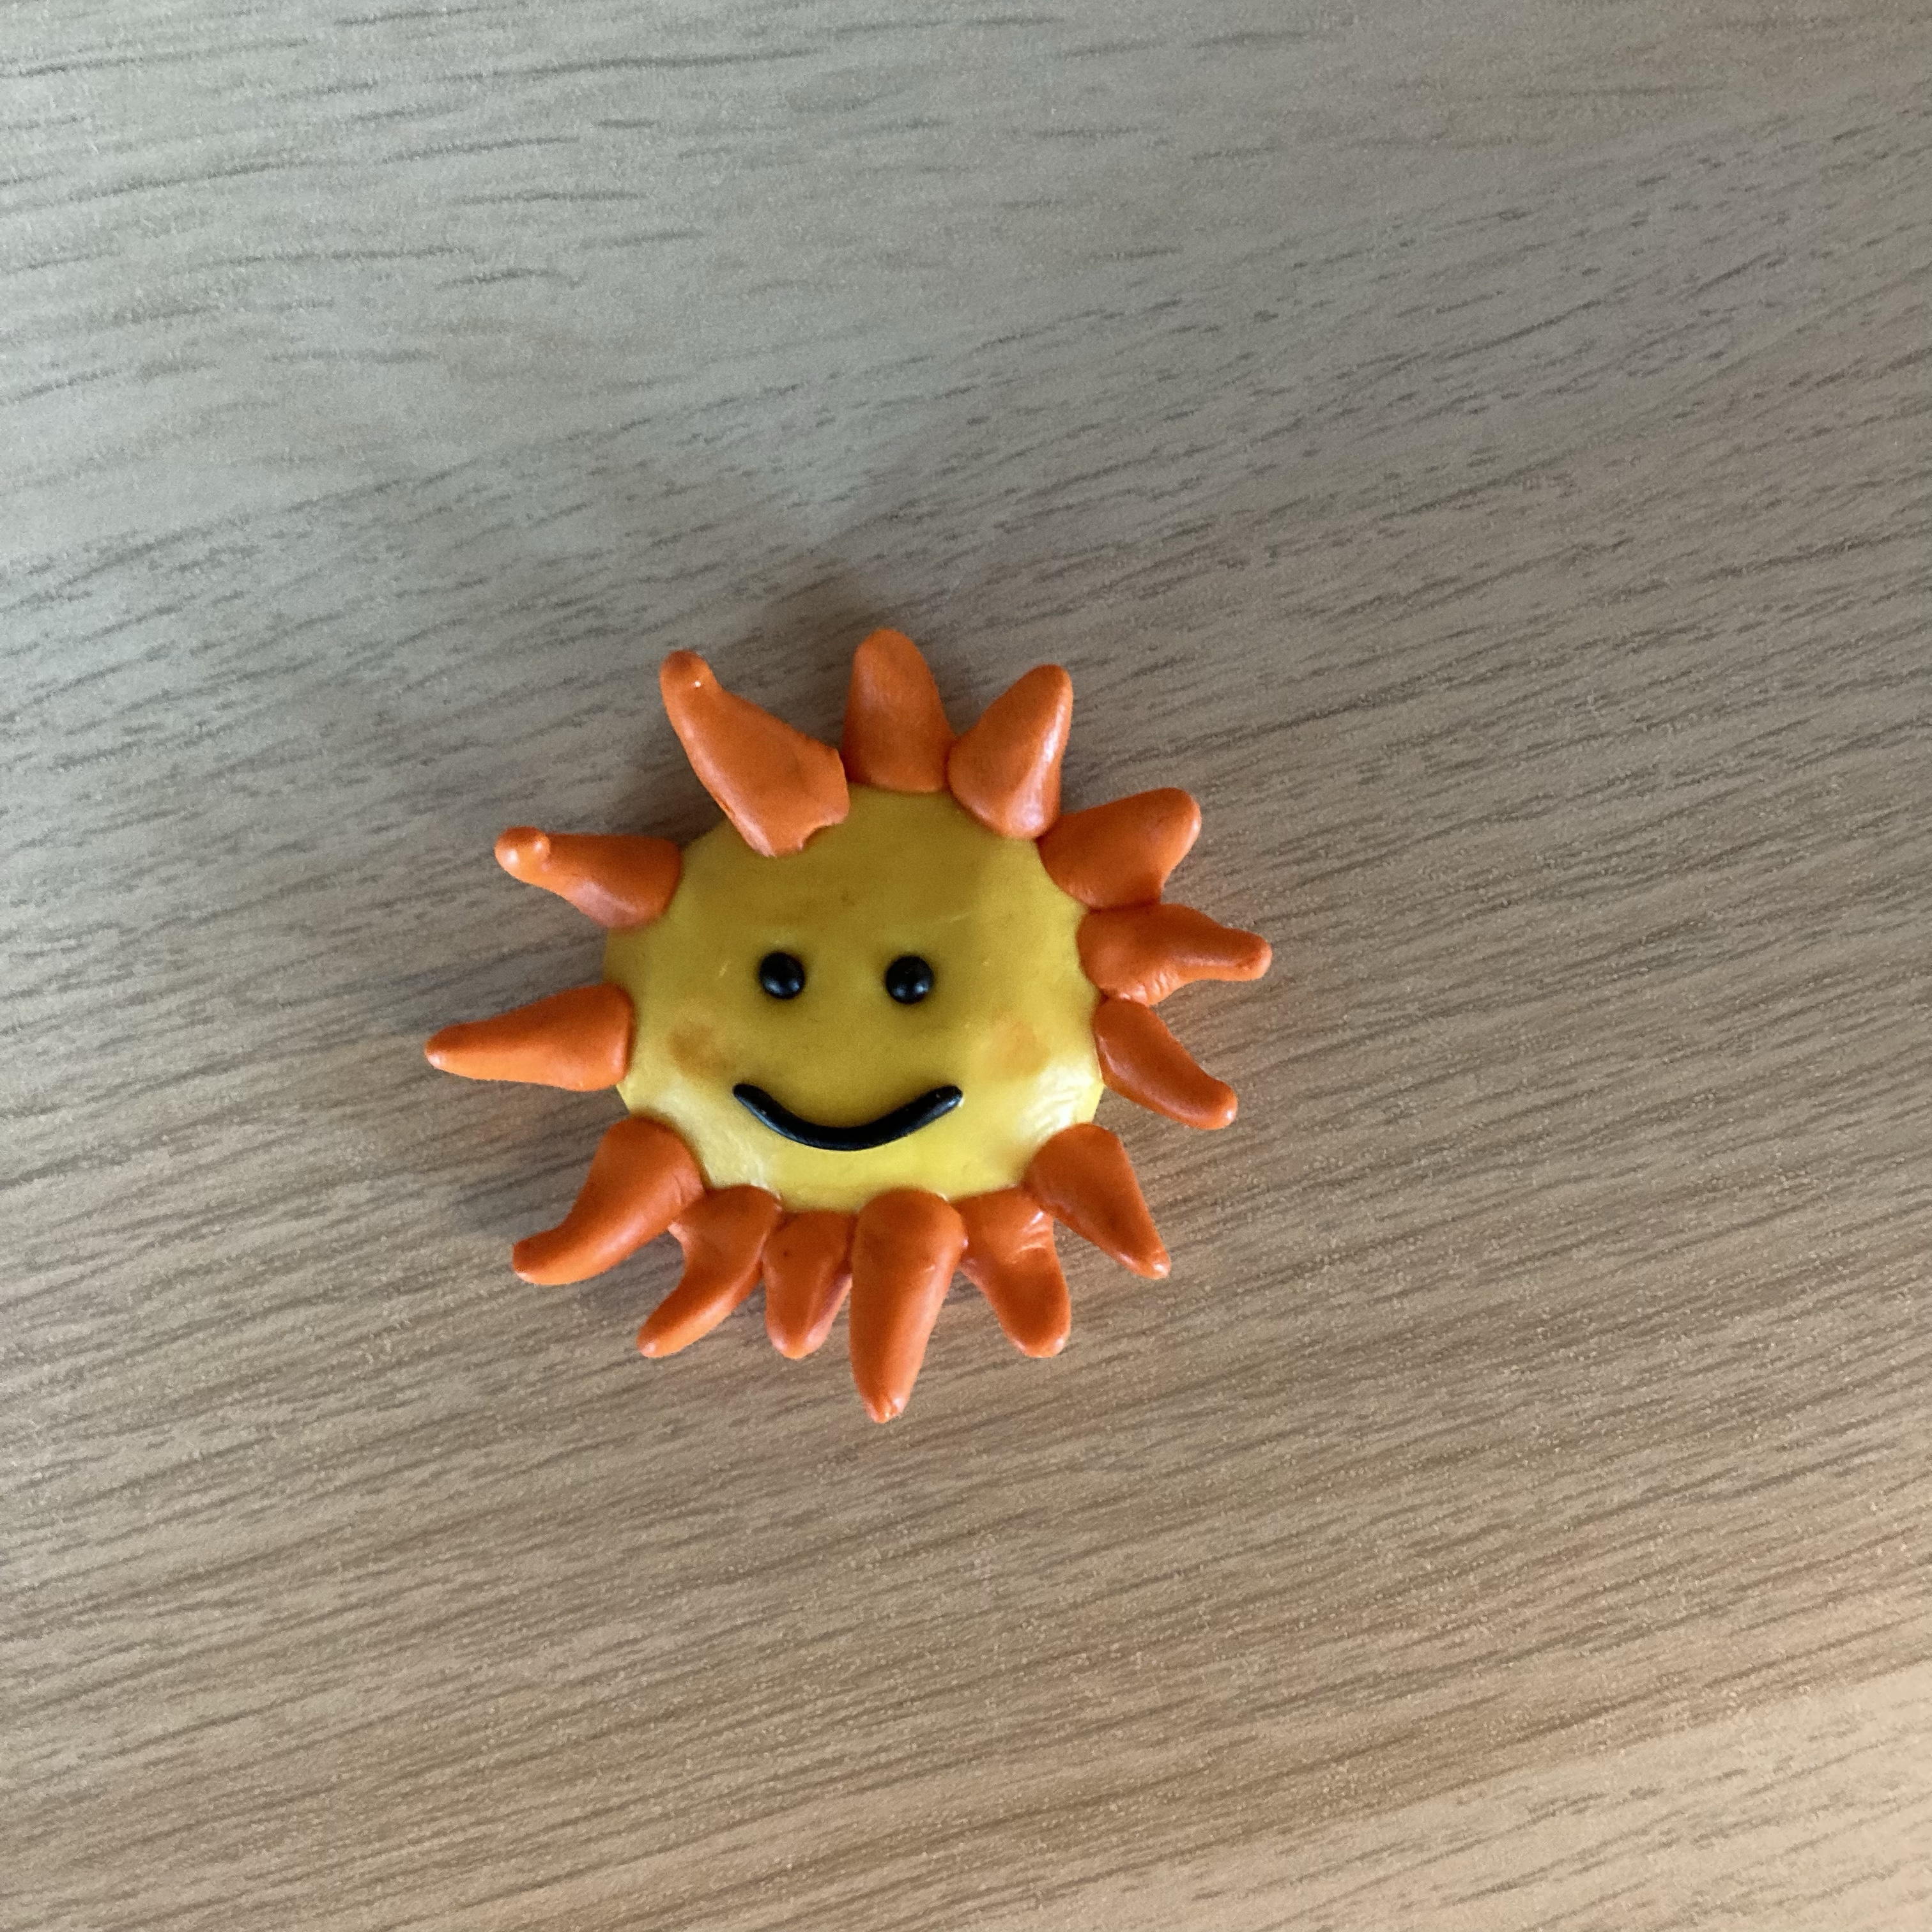
The first one is a sun. I did its “body” using Fimo Soft in the color Lemon. I started by creating a ball, then flattening it into a dome shape.
For its rays, I used Fimo Soft in the color Tangerine. I created short snakes that I flattened on one end and turned pointy on the other to form the beam. This was not how the person doing the tutorial I followed, did it, but I felt this is how it worked for me. I then attached the rays to the body. I decided to turn them slightly upward, as I liked that better than a completely flat sun. Once I’d baked my sun, I found out that at least one of the rays is bent upwards a little too much.
Then I created eyes and a mouth out of black Fimo (I think it’s Fimo Professional, but not 100% sure). I still struggle to get my eyes to be equal size, as you’ll see in the picture of the cloud below. Finally, I used an orange chalk pastel to color “cheeks” on the sun. I didn’t like pink for the sun, because I wanted to give it a little sunset-style look.

The next thing I created was a cloud. I struggled a little with its indents or curves and, to be honest, I like this one least out of the three creations. I did this one using Fimo Kids in the color Glitter White. I again added a black mouth and eyes (you can probably tell its left eye is larger than its right eye). This time, I added light pink chalk pastel for its cheeks. I had originally wanted to go for a blue overall dusting, but my staff said pink cheeks looked better.
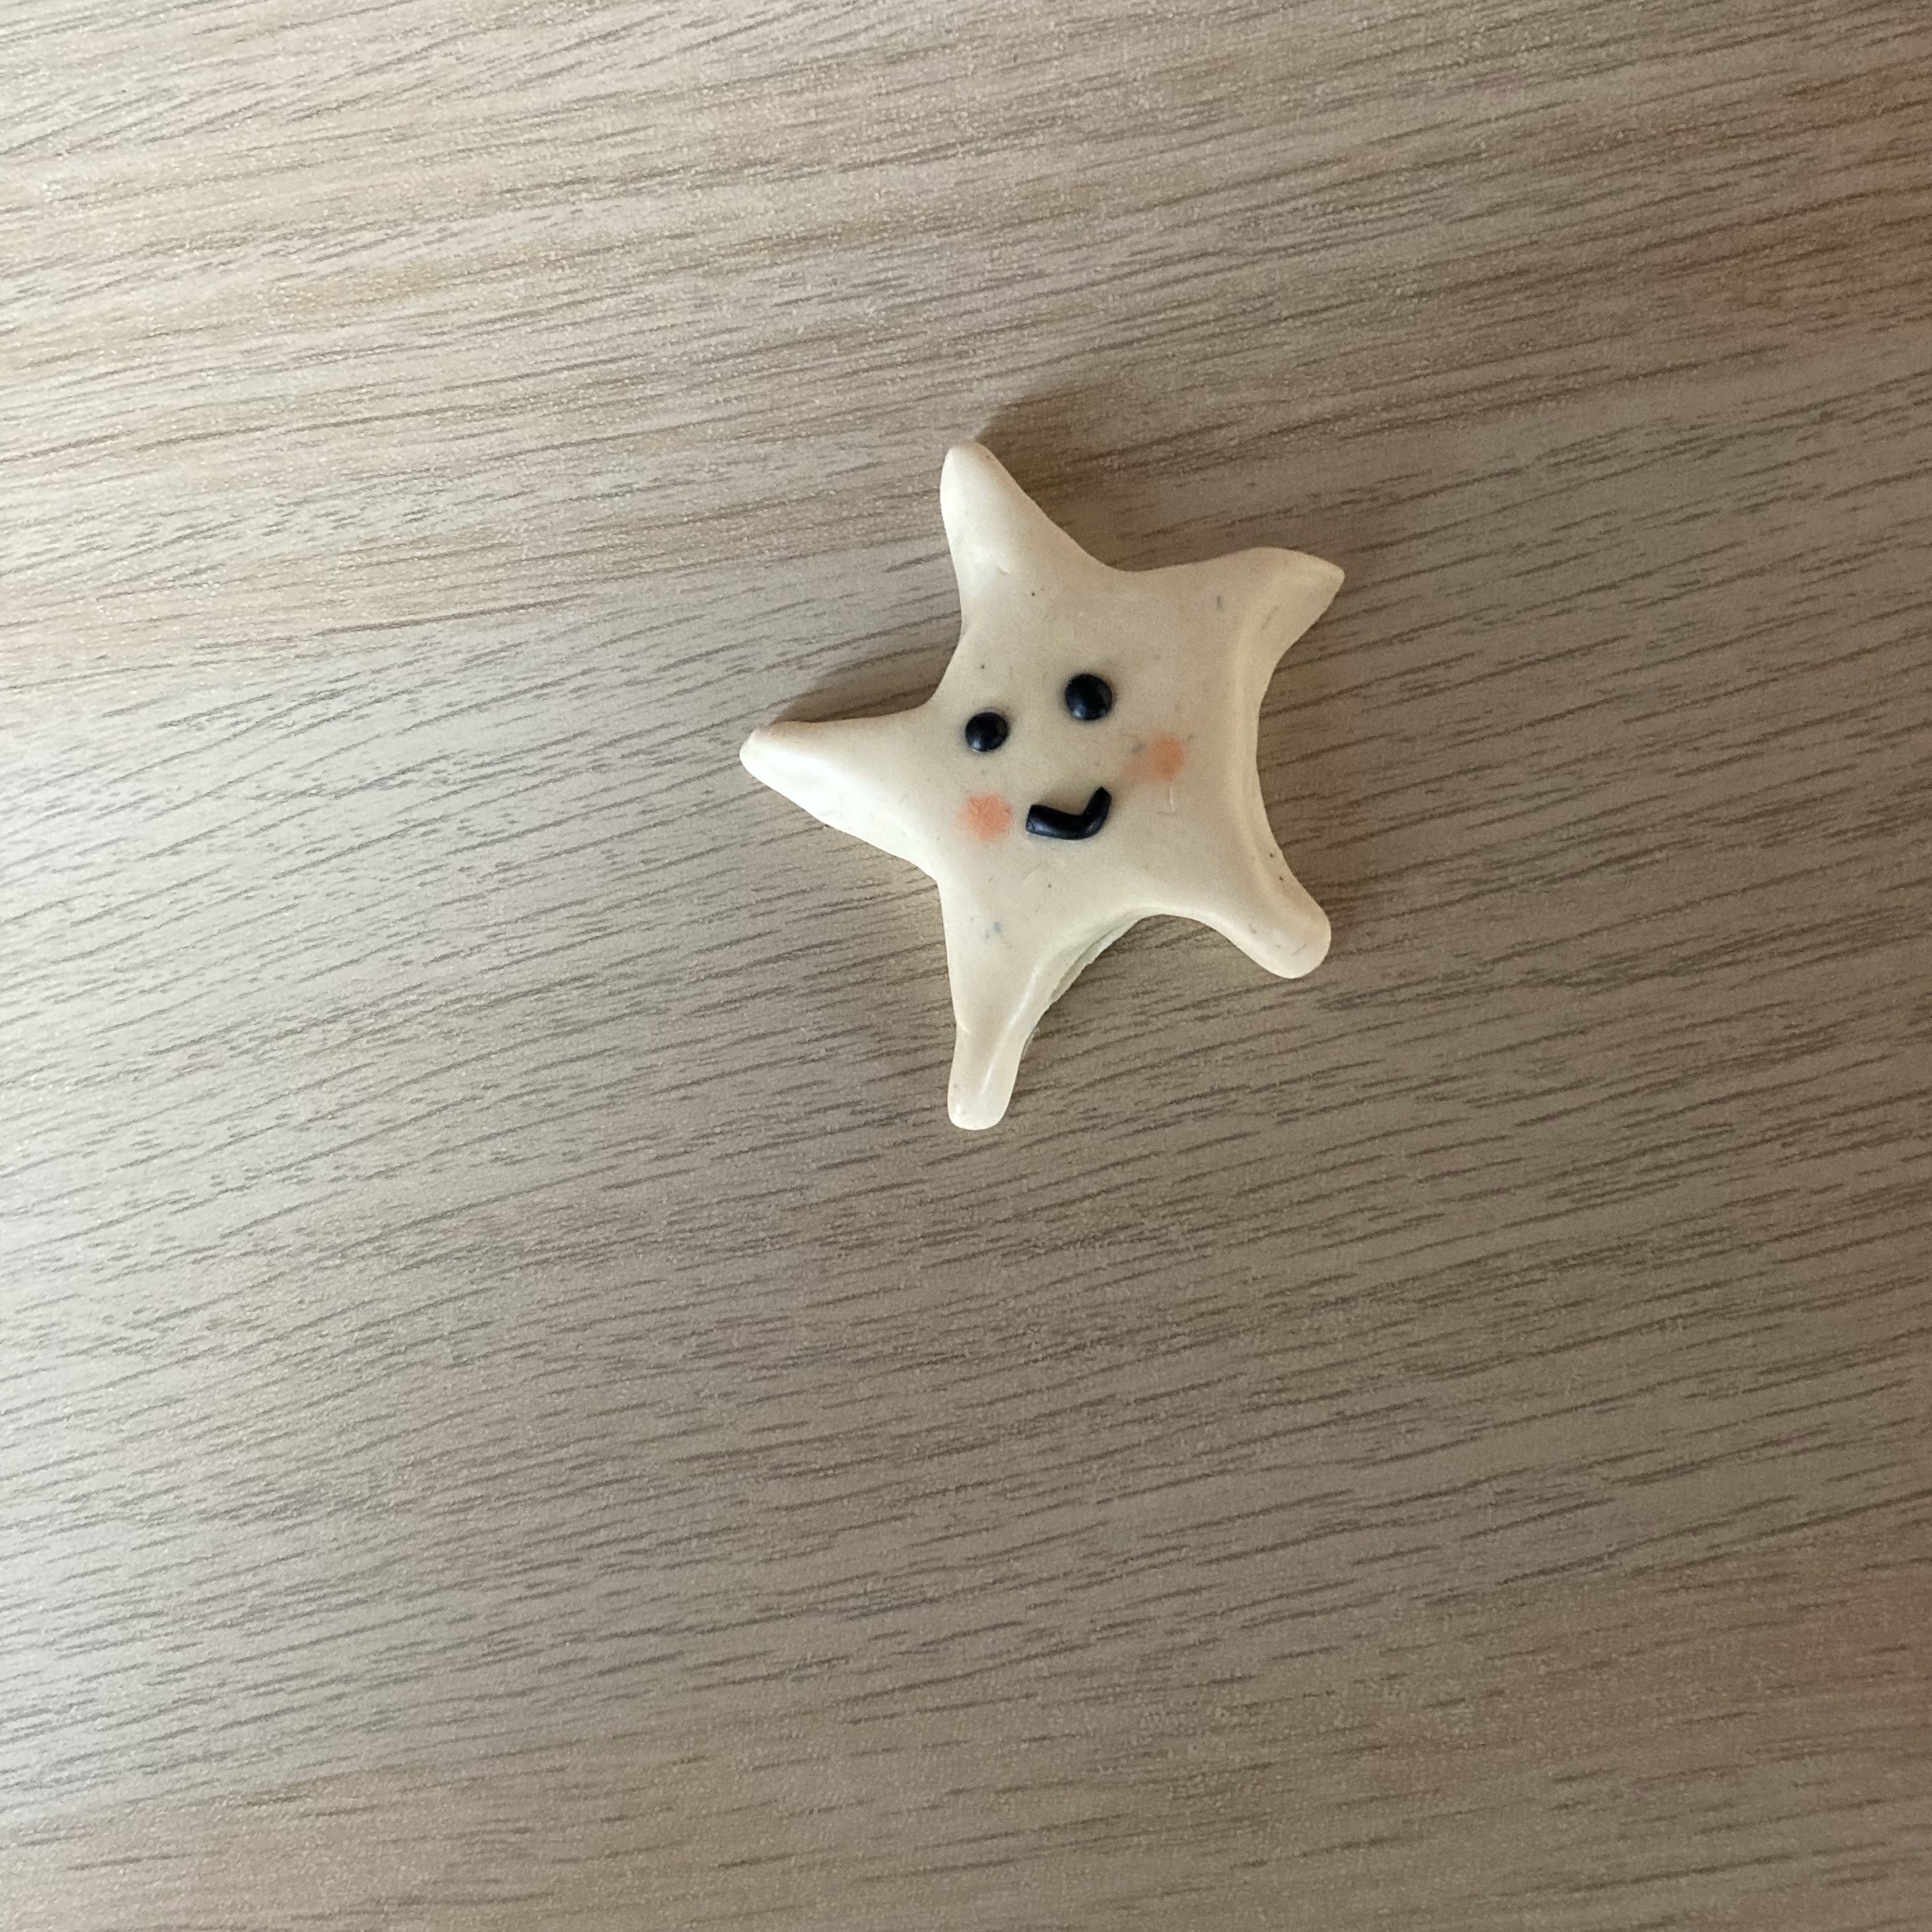
Finally, the star! This was the one that took me the most practice. I shaped the entire thing using my fingers out of a ball of clay, in my case Fimo Effect in the color Pastel Vanilla. I can’t explain how I did it, but Creative Rachy on YouTube has the tutorial. I again added a black mouth and eyes and pink cheeks (a darker shade than for the cloud).
I cured each of my creations on my oven-safe workmat, because I was scared of damaging the back if I’d bake directly on the tile. The back didn’t turn out as well as I’d like to, but you don’t see this when not holding the things in your hand anyway.
Because I’d used chalk pastels on each of these creations, I had to glaze them in order to protect the chalk pastel. I used Cernit varnish in matt for this. I did two coats on each of these things and then popped my creations in the oven again to harden the glaze.
I really love these little projects. Each of them was relatively easy. I am still looking to improve my craft, of course.
Linking up with Fabulous Friday.

Cute
LikeLiked by 1 person
Thank you!
LikeLike
They are all very cute.
LikeLiked by 1 person
Thanks so much!
LikeLiked by 1 person
You’re welcome
LikeLiked by 1 person
I think all three are cute. The sun might be my favorite because of the colors.
LikeLiked by 1 person
Thank you. Yes, I think the sun is my favorite too.
LikeLike
Cute, especially the sun.
LikeLiked by 1 person
Thanks!
LikeLiked by 1 person
Most welcome!
LikeLiked by 1 person
I enjoyed the spikiness of the sun’s rays.
Gave it some edge and some assertiveness.
[they also may have people think of candy corn – the general 3d form].
One of the rays at the bottom is indeed bent too much.
Though eyes are not often equal size – even among humans. [says she who has one eye too often in photos thinner than the other].
And you can get some aesthetic play out of that.
Not that clouds and stars can’t be assertive too – the star and its turnings did suggest punkishness / puckishness [like the Shakespeare fairy character].
Very impressed with how you used minimal varnish to get the effects in.
The cloud seemed more like a flower or windmill to me [at least the blades of the windmill]. Then I thought – hmmm, maybe more shell-like?
[Yes – I know – imagining things into the cloud! and out of it too]
I thought the right eye was larger – largely because of where it was pointing.
Or maybe the way the dot was given more depth / less flatness?
[MissLunaRose, some years ago, wrote about “Where are Charlie’s eyes pointing? I don’t know what he wants!” AUTISTIC DREAMS is where you can go].
The mouth and the cheeks were very well put together in that position and proportionality.
I wonder – was the cloud dusted?
If I were to “cheek” a star and make it shimmer …
A good art mate of mine loves to make galaxies. They are also awesome at sticker making and pins
[and it makes me want to go through the GEORGE’S SECRET UNIVERSE books].
Fimo Soft and Fimo Professional must have different consistencies and different crumble thresholds.
LikeLiked by 1 person
Thank you so much for sharing your thoughts. No, the cloud wasn’t dusted. It has some glitter in it. Fimo Kids is indeed the softest, then Fimo Soft and Fimo Professional requires a lot of conditioning for it to become workable. I used to have some older Fimo Professional and it was indeed pretty crumbly.
LikeLike
Good to know about the glitter.
[subtle glitters make such a difference!]
What a wonderful clay for children to be able to work with.
Conditioning – with oil [like vaseline] or with water – or kneading?
LikeLiked by 1 person
Conditioning is done by kneading or by rolling your clay through the pasta machine, then folding it in half, then rolling it through the pasta machine again repeatedly. If it’s very crumbly, some liquid clay or clay softener can be added to soften the clay, but this is not recommended on fresh clay.
LikeLike